An online tutorial on faux antiquing: in other words,
do-it-yourself instructions for restoring and refinishing old furniture
to look antique.
Here it is, a step-by-step guide to faux antiquing for
beginners like me!
It's like magic.
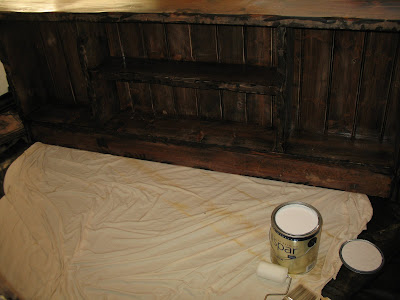
From this . . .


. . . to this! Bam!
 Materials:
- old piece of furniture
- plenty of sandpaper or a sander (with grit coarse enough to strip old finishing)
- steel wool (coarse) or (again) sander
- a candle/chunk o' disposable wax
- ink/permanent marker (optional)
- 1 can paint (base coat, latex)
- 1 container glaze
- a paintbrush (and little roller, helpful for bigger items)
- screwdriver
- rags
Step 1: Remove Hardware & Prep Workspace
Remove
knobs, handles, screws, hinges, etc. from the piece and set aside. Set
your piece in a good working space where you can paint and make a decent
mess. Clean up for us was super easy; we spread out an old bed sheet in
the room over some plastic tarp/tablecloth-type stuff and threw it all
out when we were done.
 Step 2: Protect Unpaintable Areas
Cover
up any mirrors or places you don't want to paint. I didn't have masking
tape or anything, so I tucked some saran wrap into the corners of this
mirror and it worked beautifully:
 Step 3: Sand
Remove
the old finish/varnish. With this piece, I wanted the dark stain to
show through, but I took off the shiny varnish layer so the paint would
stick. This took a while, but it was a pretty big piece. After sanding,
vacuum up the sawdust and wipe down the wood with a damp rag for a clean
painting surface.

 Step 4 : Ink Corners
 (Optional)
I
brushed some Indian ink around the corners to show through. It was an
experiment, but it looked pretty cool in the end. You can also use a
permanent marker to add some black touches on the finished product, but I
think that looks better on carvings and more intricate designs. This
piece didn't have much flare in the woodwork to accent, so I just
focused on edges.
 Step 5: Wax
Not your legs. Because
you'll be removing paint from certain areas to give the piece a worn,
antique-ee look, you use the candle to rub on the corners and areas
where you want the paint to come off easily. This step was really
helpful; once the paint dried, it took a lot of elbow grease to scratch
it off again, but you could tell where the wax was. It really worked.
 Step 6: Painting
The
fun part: painting! I got a whole gallon of paint, but I didn't even
use half the can for two coats on this massive piece of furniture. I
chose a shade of humble gray and a taupe glaze, which really warmed it
up in the end. I painted in the morning and scraped some off at (see the
next step) night, and that was enough time for the paint to dry.
 |
| Coat One |

 Step 8: Glaze
This
is when my husband joined in to help me glaze. He went around painting the glaze on and I followed him with a rag. We
used the rag-rolling technique, removing the glaze and texturing with a
rag. I used an old towel with a good cotton-y grain to it.
*Note: The finished product had kind of a chalky, matte texture. I think it would have been awesome to spray or paint a coat of lacquer over it for some gloss and protection. I also hear that using a finishing wax (wax on, wax off) like
Minwax® Paste Finishing Wax is a good protecting agent that also smooths out the finish.


And let it dry!

Viola!
The finished product: a new place for books.

That was that. On the Monday before a Saturday housewarming party I
picked up two halves of a large piece of beat up furniture ($15 per
half) at
Savers. I bought paint and materials on Tuesday (for about
$60), sanded on Thursday (4 hours), prepped and painted and glazed on
Friday (8-10 hours), and it was ready to put up on Saturday morning
(although it wasn't totally dry for the party).
A really fun project. Totally recommend it.
*After three years, I just sold this piece to a young couple. Last week, actually. A young New Yorker bought it for his wife's birthday. They had a cute four-month-old. So while I miss this piece, I'm happy it's in a good home. And I filled the space with a bomb.com retro table and chairs. And if I kept everything I made, I'd end up on Hoarders.