|
| The finished product. |
I took up a recent undertaking to decorate a small room in much need of some life: the nursing lounge at the church. I've spent hours in there in the last two years with my first and second child, and I've long felt that the space could use a little color and excitement.
The chairs are blue, the walls are now yellow, the carpet is blue, there's a gold-framed landscape painting on one wall. I'm picking up a small oak child's rocking chair tomorrow. But I thought the room needed one more touch to make it more personal: I decided to make a fabric bulletin board for baby pictures of children in the ward. I'm posting a call in our weekly newsletters for photos, and I can't wait to pin up those cute baby faces!
I followed
this tutorial by
freshvintage as a guide, but since I did a few things differently I thought I'd write my own how-to. Here goes!
______________________
HOW TO MAKE A FABRIC-COVERED BULLETIN BOARD
MATERIALS
- Corkboard
- Fabric of choice
- Iron
- Paint (spray or liquid)
- Drop cloth or newspaper
- Masking tape
- Iron-on double-sided fusible interfacing (available at JoAnn's or any quilting/fabric shop)
- Rotary cutter and mat (or scissors and measuring tape/ruler)
- Glue (I used Elmer's all-purpose, but you could be all fancy and use fabric or hot glue)
- Craft felt, ribbon, or rick-rack (in a color that accents your fabric and frame)
- Blow drier (if you want your paint to dry faster)
1. Obtain or make a framed cork board. You could make a huge one out of insulation board from Lowes and staple the fabric onto it. You could find a thrift bulletin board to work with. You could use an existing frame and insert a piece of cork cut to size. Or, you could
go to Target like me and just buy a nice new inexpensive corkboard. I got this pretty large one for
$17.00.
2. Paint the frame. Spread out your drop cloth or newspaper to paint over. Put your kids to bed or lock them away. Use the masking tape to protect the corkboard if you're brushing on paint, or cover it completely with paper and tape if you use spray paint.
I pulled out some gold acrylic paint I've had for years. All in all, I
tried to
make this project using what I already had--I am all about simplicity (and not going to the store more than I need to). So be creative working with what you've got!
This black Target frame took three or four coats of paint, a gold irridescent that I thinned with some Liquitex glazing I have because I was worried I might run out of the gold if I used it straight up.
The finished paint job doesn't look great up close--you can see my chunky brush lines, but I tell myself that the hand-painted textured look gives it a nice touch--just to make myself feel better.
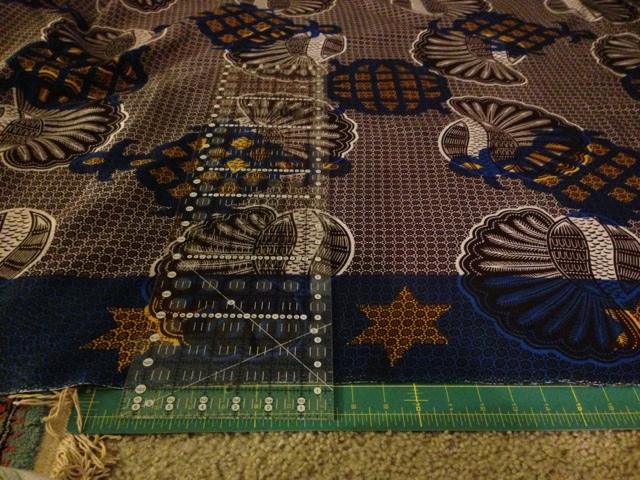
3. Press your fabric with the iron and cut it to size. The rotary cutter, ruler, and mat will give you super straight lines and accurate measurements. But if you don't have these, (like I said earlier), work with what you've got! That's what thrift is all about right?
This fabric is some beautiful yardage from Africa that my sister-in-law got for me during her Peace Corps service in Botswana. I think it's so striking.
4. Lay your fabric on the board. Make sure it fits fairly well, but don't worry if the edges aren't perfect because that's what your ribbon/felt/rick-rack trim will hide. My trim is a 1/4" if that gives you an idea of how much room there is for error.
5. Use the fusible interfacing to adhere your fabric to the board. I was working on this last night, feeling so irked that I didn't have any spray-adhesive glue stuff and I couldn't just go out and buy some right then, nor did I want to go out and buy it at all. I stewed over what might work that I have and I remembered I had leftover fusible interfacing from the recent reupholstery project I did.
I love how well it worked. I actually recommend this rather than using a spray glue because it's cheap and not as messy and maybe even more environmental (sans aerosol can). If you have enough interfacing to cover the whole cork board, awesome. I only had a little left, so I cut up what I had and stuck it on like so:

Not having the whole cork part completely covered with interfacing worked wonderfully! The fabric is super smooth on there after pressing it down with no bubbling at all. And considering its going to get covered with photos and thumbtacks, it doesn't really matter anyway.
6. Using your rotary cutter and ruler again to cut 1/4" strips of craft felt. Note: the strips do not have to run the length of the board. You won't be able to tell where pieces meet up if they're cut straight and to size. See the photo below. Can you see where the two strips meet? Not really? Neither can I.
7. Glue your fabric strips around the edges of the frame. I know real crafters use fabric glue, but how often do I actually glue fabric? Pretty much never. I used Elmer's glue for this small little step and (whoa!) it worked just fine.
8. Hang it up and pin things on it! Yay!
 |
| Nursing Lounge 2.0 |
___________________________
And now that I finished this one for the church, I totally want one for myself! Looks like I've got more crafting to do. Woe is me.